Summary
The Polygon Bridge allows users to quickly transfer ERC tokens and non-fungible tokens (NFTs) to the Polygon sidechain. There are two main types of bridges in Polygon, namely the Proof of Stake (PoS) bridge and the Plasma bridge. Both bridge assets from Ethereum to Polygon (and vice versa), but take different approaches to security.
PoS Bridge uses the Proof of Stake (PoS) consensus algorithm to secure the network. It supports the transfer of Ethereum (ETH) and most ERC tokens. It is recommended that most users choose PoS bridge.
Plasma Bridge is suitable for developers who need to improve their security protection. It uses the Ethereum Plasma expansion solution and supports the transfer of MATIC, ETH, ERC-20, and ERC-721 tokens.
Introduction
As the number of blockchains in the cryptocurrency field continues to increase, sharing between different networks Data and tokens become conundrums. Some projects are addressing this issue by improving asset transfers through network bridging.
The Polygon Bridge is designed to improve interoperability between the Polygon and Ethereum blockchains. With compatible cryptocurrency wallets, users can easily transfer tokens back and forth.

What is a Polygon bridge?
Polygon is an architecture that can be used to create Ethereum-compatible blockchain networks and scaling solutions. It aims to provide tools for building scalable decentralized applications (DApps), continuously enrich the Ethereum ecosystem, and increase Ethereum transaction volume by reducing fees. Polygon has deployed some popular decentralized finance (DeFi) platforms, such as Aave, Curve, and SushiSwap.
Only by transferring assets to the Polygon network can you interact with DApps and tools in Polygon. This is where Polygon Bridge comes in. Polygon Bridge is a trustless cross-chain transaction channel between Polygon and Ethereum. Users transfer ERC tokens and non-fungible tokens (NFTs) to the Polygon side chain by using smart contracts.
How does the Polygon bridge work?
Polygon Bridge uses a dual consensus architecture to optimize speed and increase decentralization. It also supports arbitrary state transitions in the side chain and is compatible with the Ethereum Virtual Machine (EVM). Cross-chain transfers of tokens can be completed instantly, without third-party risks or market liquidity restrictions.
By bridging tokens through the Polygon bridge, the circulating supply of the token will not change. Tokens are locked as they leave the Ethereum network and minted in the Polygon network at a 1:1 ratio equal to the number of pegged tokens. When bridging tokens back to Ethereum, the pegged tokens in Polygon will be destroyed, while the tokens in Ethereum will gradually be unlocked in the process.
There are two types of bridges in Polygon that support asset transfers, namely Proof of Stake (PoS) bridges and Plasma bridges. As the name suggests, PoS Bridge uses the Proof-of-Stake (PoS) consensus algorithm to secure the network. Deposits to PoS bridges are completed almost instantly, but withdrawals may take a while to be confirmed. The PoS bridge supports the transfer of Ethereum (ETH) and most ERC tokens.
Plasma Bridge supports the transfer of Polygon’s native token MATIC and some Ethereum tokens (ETH, ERC-20, ERC-721). It uses the Ethereum Plasma extension solution to effectively improve security. Please refer to the official documentation for detailed technical information.
How to bridge tokens from Ethereum to Polygon via PoS bridge?
To bridge tokens from Ethereum to Polygon, you need to use a compatible cryptocurrency wallet (such as MetaMask). If you don't have a MetaMask wallet, please follow the steps in this tutorial to create it. You also need to download and install the MetaMask browser plug-in.
1. Click [Polygon Bridge] to log in to the Polygon web wallet.

2. Next, link your cryptocurrency wallet. In this example, we use Metamask.

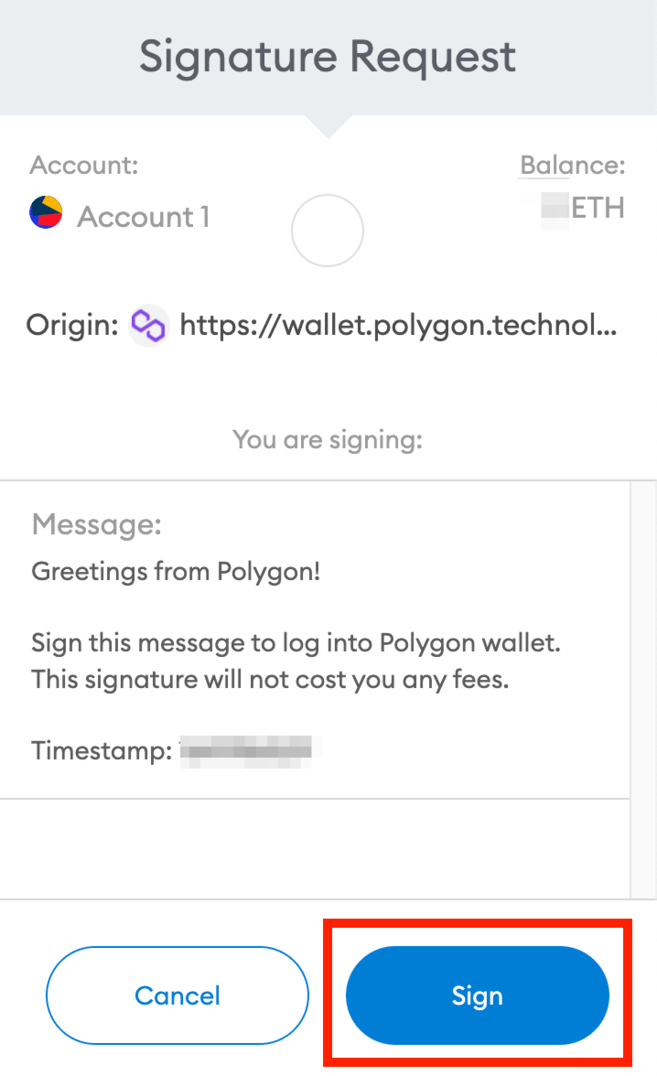
3. You need to sign a message to associate the MetaMask wallet with the Polygon wallet. There is no fee for this signature. Double check the URL to make sure you are logged into the correct website, then click [Signature] to continue.
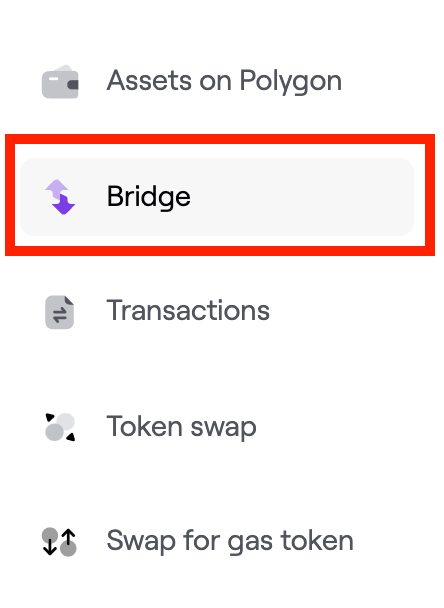
4. The page should go to the Polygon bridge interface. If it is not displayed, click [Bridge] on the left side of the menu bar.
5. To transfer tokens from the Ethereum mainnet to Polygon, please click the [Recharge] tab. Click on the token name and select the token to be bridged. In this example, we use Ethereum (ETH). Enter the amount and click [Transfer].

6. Read the important tips and click [Continue] when you are ready.

7. You will also see the estimated gas fee for this transaction. If you are ok with the fuel cost, click [Continue].

8. Before clicking [Continue], please check the transaction details, including the number of tokens and estimated transaction fees.
Please note that PoS bridges are protected by validators. If you decide to transfer funds back to the Ethereum network, it may take up to 3 hours.

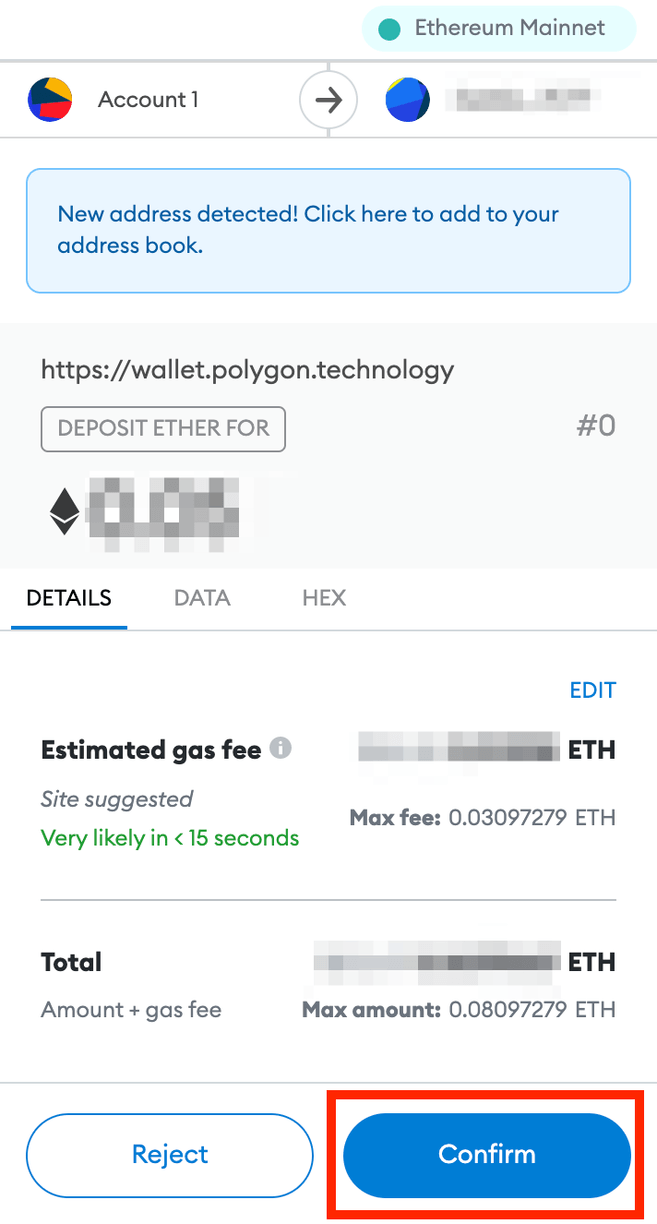
9. The system will prompt you to sign in the MetaMask wallet and approve the transfer. Check that the details are correct and click [Confirm].
10. After confirmation, wait for the tokens to be transferred to the Polygon wallet. Click [View via Etherscan] to check the transaction status.

How to bridge tokens from Polygon to Ethereum via PoS bridge?
Tokens can also be transferred from Polygon to Ethereum using the Polygon bridge. A compatible cryptocurrency wallet such as MetaMask is also required.
As mentioned above, there are two types of bridges in the Polygon network: Plasma bridge and PoS bridge. Withdrawal times depend on all Polygon bridge types. Withdrawals using PoS bridges typically take 45 minutes to 3 hours, while Plasma bridges can take up to 7 days.
Let’s learn how to transfer tokens from Polygon to Ethereum via PoS bridge.
1. Click [Withdrawal] on the [Bridge] interface. Select the currency you want to transfer to the Ethereum network.

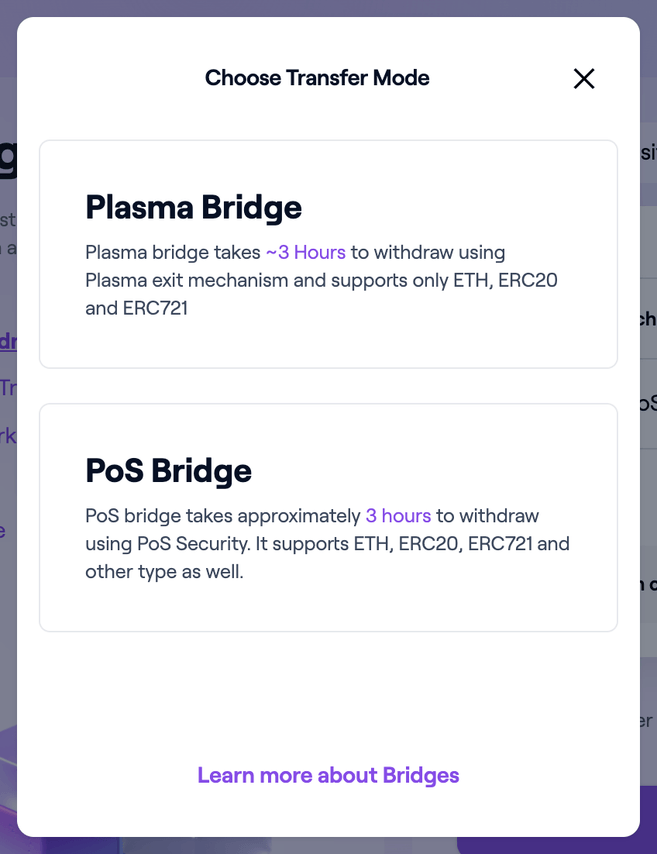
2. You may notice that there is a [Convert Bridge] button next to [Transfer Mode]. The platform will automatically match the bridge that is compatible with the transfer based on the token you choose.
It is recommended to use a PoS bridge to transfer tokens from Polygon to Ethereum. It supports the transfer of Ethereum (ETH) and other Ethereum tokens, including ERC-20, ERC-721, ERC-1155, etc.
3. After selecting the token, enter the amount you wish to transfer and click [Transfer].

4. Read the important tips and click [Continue] when you are ready.

5. You will also see the [Transfer Preview] pop-up window, showing the estimated gas fee for this transaction. If you are ok with the fuel cost, click [Continue].
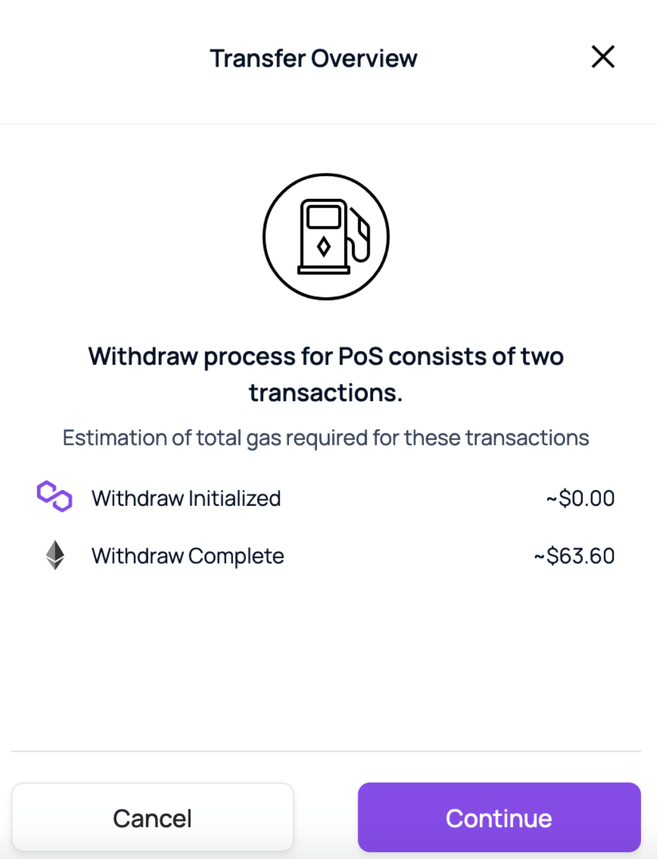
6. Before clicking [Continue], you can review the transaction details such as the number of tokens, bridges used, and estimated gas fees. .

7. The transfer needs to be signed and approved in the MetaMask wallet. Check that the details are correct and click [Confirm].
After confirmation, wait for the tokens to be transferred to the Polygon wallet. Click [View via Etherscan] to check the transaction status.
8. Next, you will see the transfer progress. When a withdrawal is initiated on the network, the PoS validator verifies the transaction. It may take up to 3 hours to complete, but you don't need to do anything. 
9. After the transaction is verified, the tokens should be withdrawn to the MetaMask wallet. Click [Continue] and the assets will be visible after the withdrawal is completed.

How to bridge tokens from Polygon bridge to Ethereum via Plasma bridge?
To transfer MATIC or other Polygon tokens to Ethereum, you can use the Plasma bridge. Please note that Plasma Bridge only supports the transfer of ERC-20 and ERC-721 tokens including ETH and MATIC.
In this example, we use MetaMask to transfer MATIC tokens from Polygon to Ethereum. The MetaMask wallet is only associated with the Ethereum mainnet by default. You need to add the Polygon network to your wallet before you can view MATIC and get started.
Step 1: Add Polygon to MetaMask
There are two ways to add the Polygon network to the MetaMask wallet. The default method is to add it manually (please refer to "How to add Polygon to MetaMask"). You can also use the Polygon wallet interface to quickly add Polygon to MetaMask's network list.
1. Please click the [Switch to Polygon] button at the top to operate. Be sure to connect the MetaMask wallet.

2. You will see the pop-up window of the MetaMask plug-in, showing the Polygon network details. Click [Approve].

3. The operation is completed. Polygon network has been added to MetaMask. Now, MetaMask needs to be switched from the Ethereum mainnet to the Polygon network. You can click [Switch Network] to perform the operation.
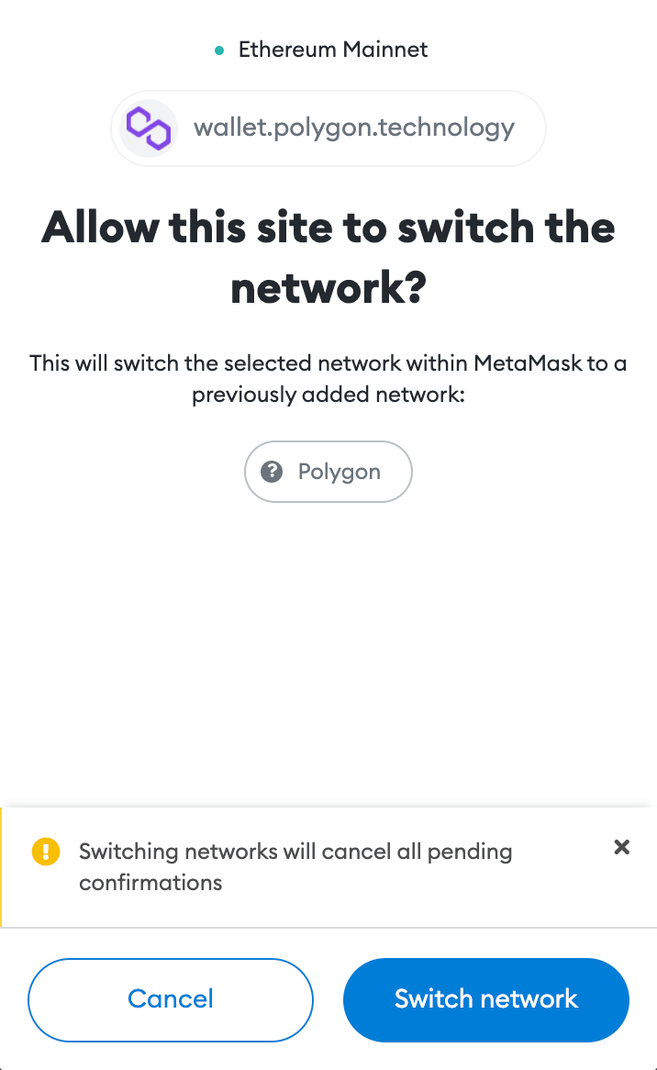
4. MATIC can now be seen in the MetaMask wallet.

Step 2: Use MetaMask to bridge MATIC to Ethereum
1. Enter [Bridge] interface, click [Withdraw]. Select [MATIC Token] in the token list, enter the amount, and click [Transfer].
The system will automatically select [Plasma Bridge] as the transfer mode.

2. Read the important tips and click [Continue] when you are ready.

3. You will also see the estimated gas fee for this transaction. If you are ok with the fuel cost, click [Continue].

4. Please verify the transaction details before clicking [Continue].
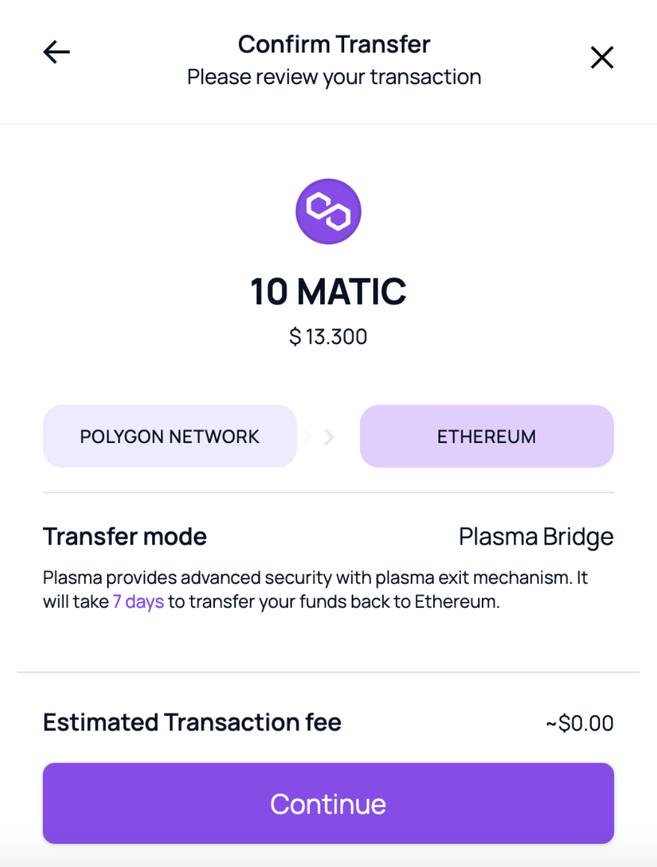
5. The system will display a MetaMask pop-up window for you to confirm the transaction. Click [Confirm] to see that the tokens are being transferred.
You need to manually confirm the three transactions transferred by Plasma Bridge. The first withdrawal is from the Polygon wallet, which may take up to 3 hours.

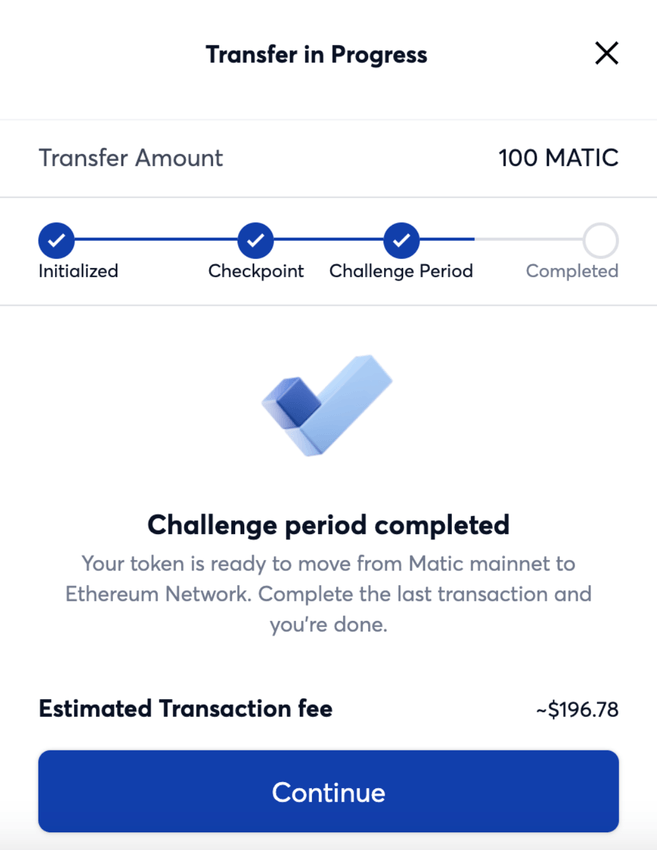
6. Reaching the checkpoint indicates that the transaction has been verified on the Ethereum blockchain. The challenge period can only begin after the second transaction is confirmed. This measure can improve the security of withdrawal transactions.
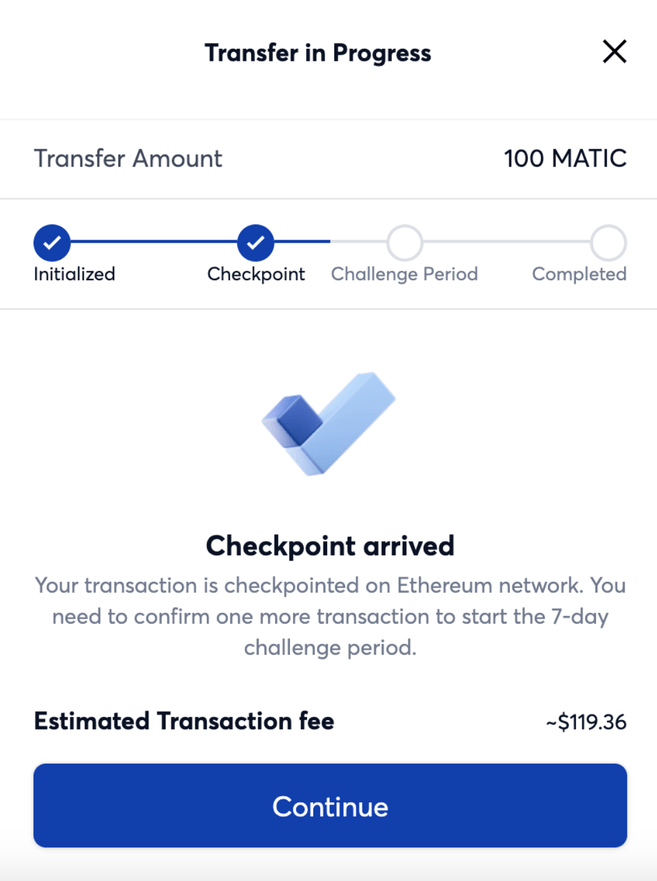
7. After the challenge period is over, just click [Continue] to transfer MATIC tokens to the MetaMask wallet.


Summary
Polygon Bridge interoperability enables users to transfer assets between the Ethereum and Polygon blockchains. Polygon Bridge is a new solution for users who want to experience different DeFi platforms and DApps on the Polygon network.
 Forum
Forum OPRR
OPRR Finance
 Specials
 On-chain Eco
 Entry
Entry
 Podcasts
 Data
Data
